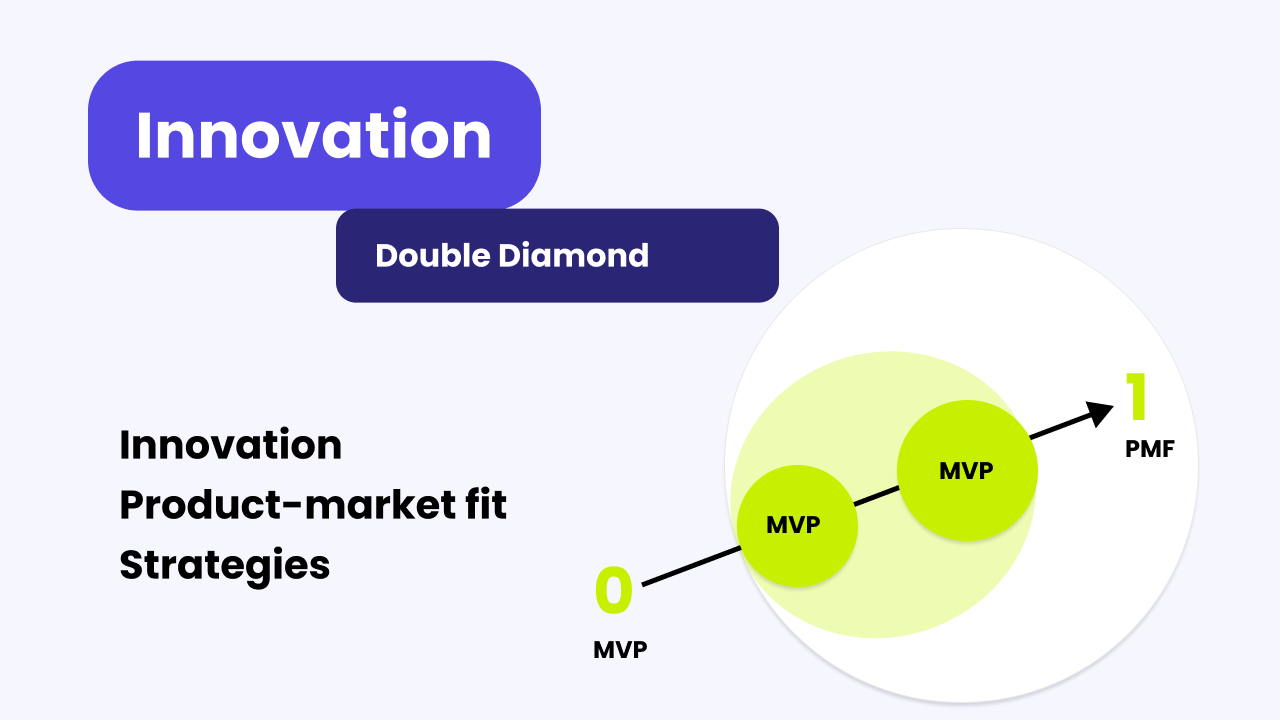
User Story Mapping framework
We're building a comprehensive knowledge library about product development as part of our mission. The library is for anyone looking to make better decisions — primarily decisions about how to further develop a product. Whether you're an inventor, a product manager, or a Chief Product Officer, using a structured decision-making method increases your chances of building the right things for the right audience (build the right thing for the right audience). Today we'll introduce the Value User Story Mapping framework.
Framework name: User Story Mapping.
Inventor: Mike Cohn and Rachel Davies contributed mainly the story format; Jeff Patton is the inventor of the mapping technique.
Year first used: 2008, and a few years earlier.
Link to original research: the article The New User Story Backlog Is a Map and the article How You Slice It.
Key figures in developing the framework:
Mike Cohn,
Rachel Davies.
Key milestones in developing the framework:
The 2005 article It's All in How You Slice It,
Development of the format largely in connection with the Extreme Programming method,
Integration into agile development,
Adding rigor through mapping.
History and Context of Use
Jeff Patton, the founder of the mapping technique known as User Story Mapping, noticed over the course of his consulting career that when teams develop software the agile way, they lose sight of the value the intended product is meant to deliver to the customer. While building a new product, teams focused too much on individual User Stories and getting them done, rather than on the overall value to the customer.
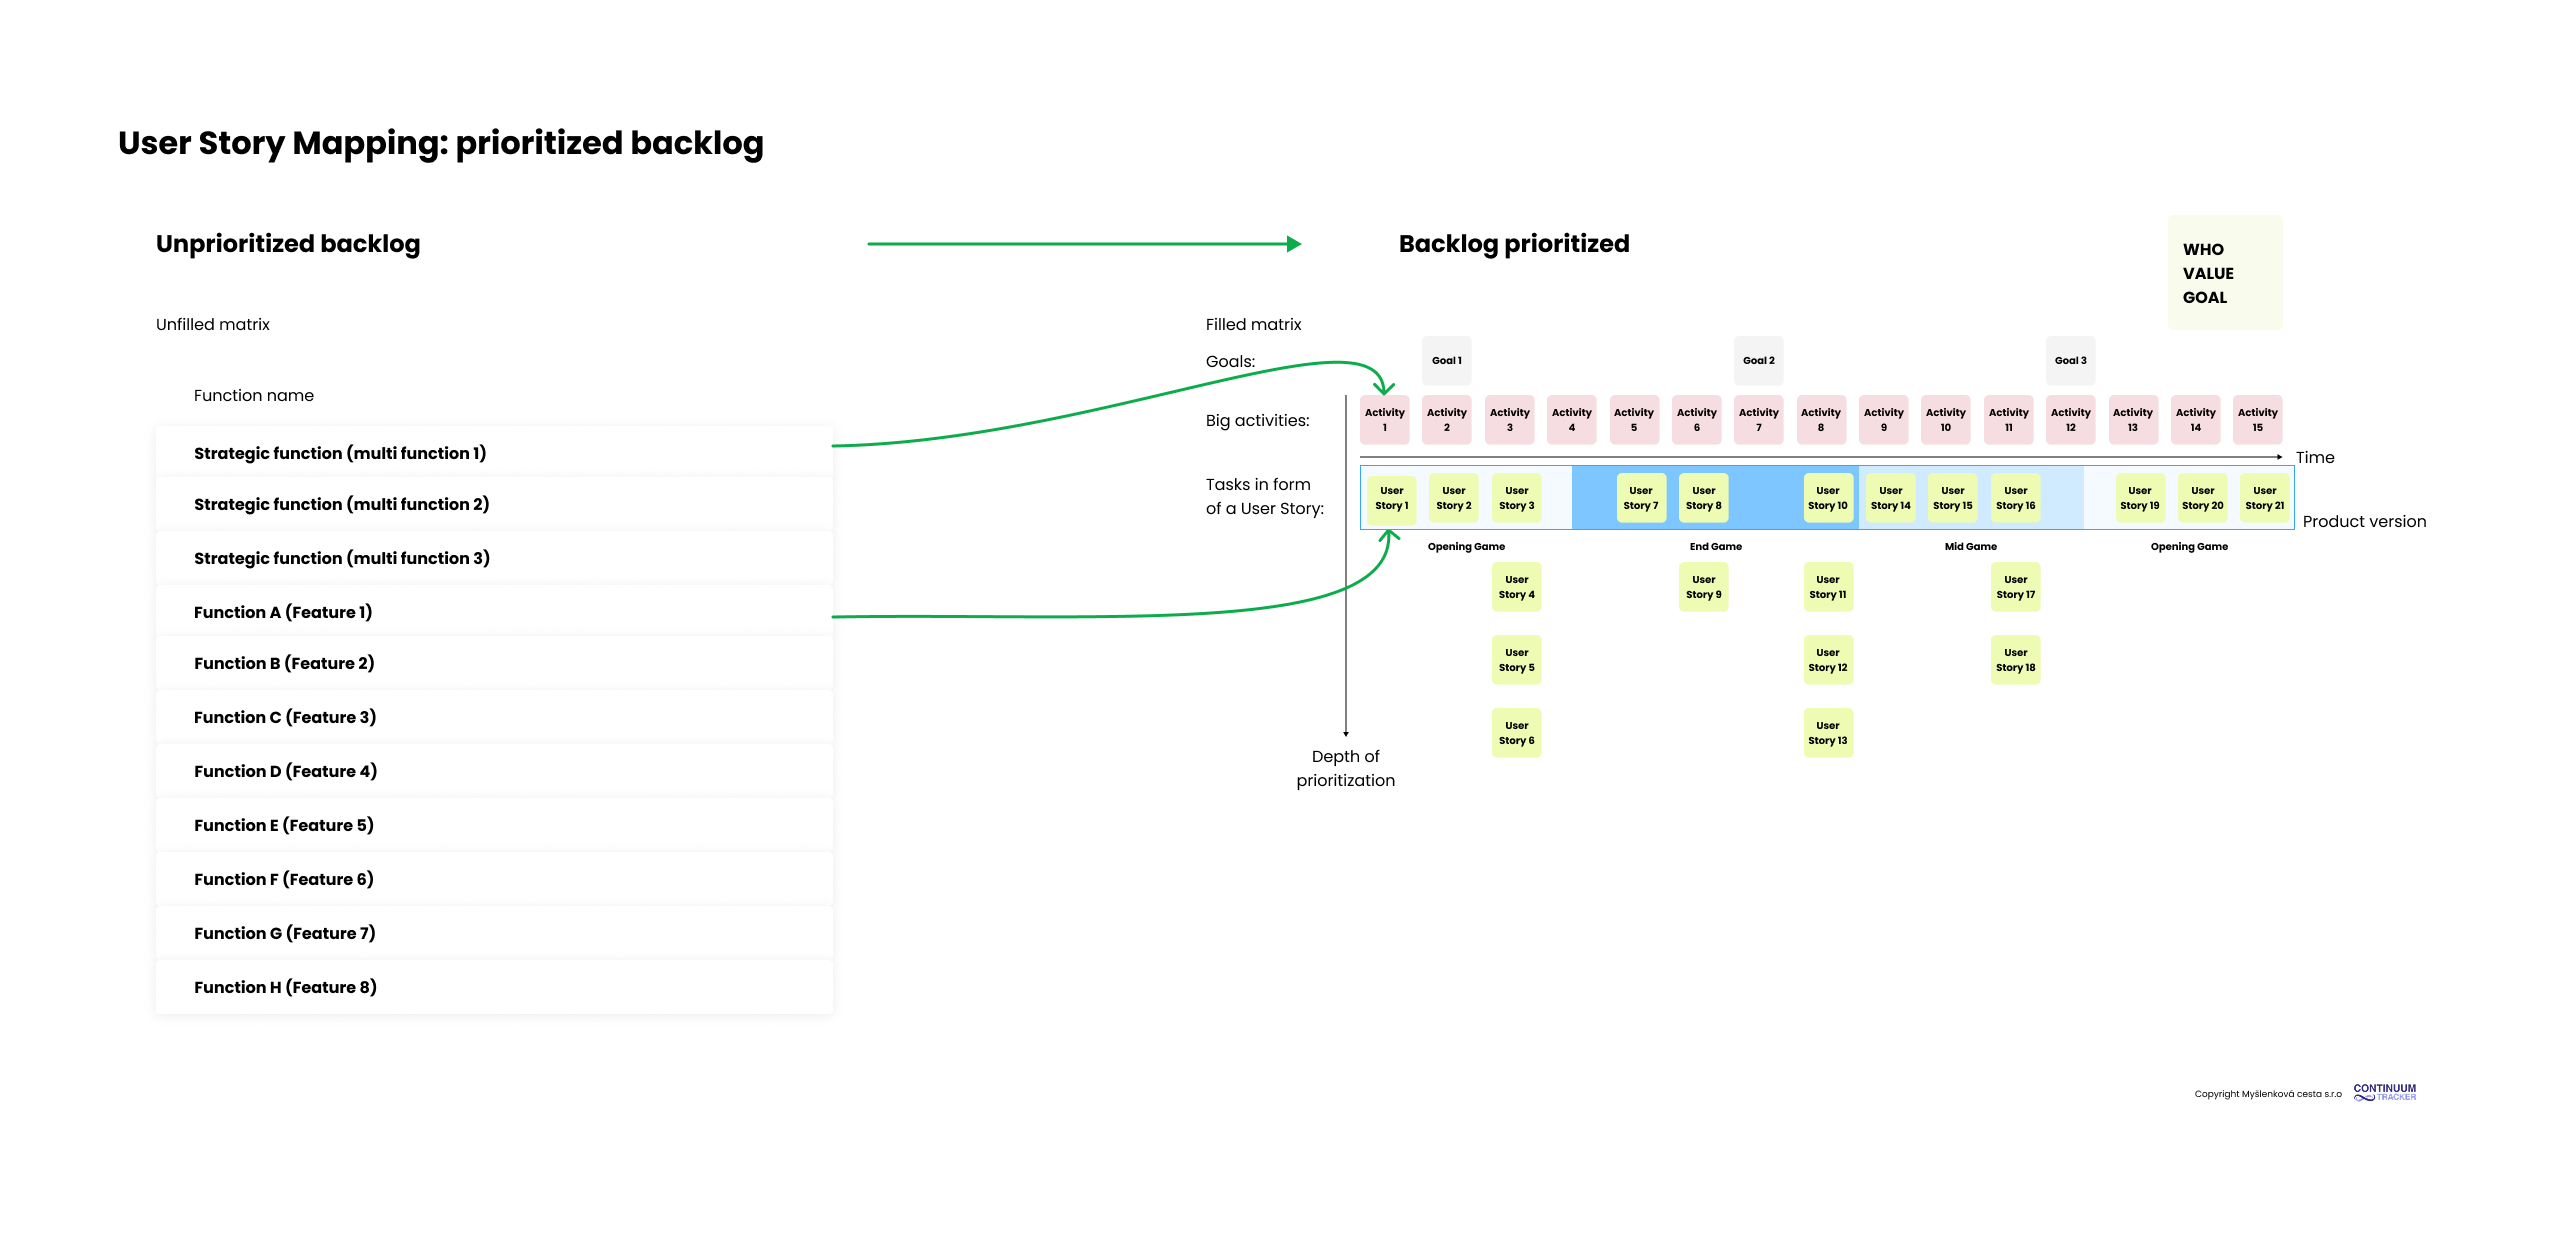
Commonly, individual User Stories were arranged into a backlog — a kind of very long, priority-ordered list of features. Over time, that list became a symbol of everything wrong with development. A developer, a senior manager, a consultant, or a product manager could stare at it for hours and still walk away feeling that something was missing.
Prioritizing this list became an exhausting process in which the entire product shrank down to a handful of sentences that were endlessly reshuffled, refined, and revised — until no one knew what the product's core value actually was. The list failed as a communication medium, yet everyone preferred it as the proper agile method.
The Basic Principle of Prioritization
The cornerstone of the framework is visualizing a product's core value from the user's point of view, along with the secondary value tied to it. The map reveals how important the supporting features are relative to the product's backbone features.
This holistic view of the product serves as a tool for prioritizing the features that aren't part of the product's backbone.
The process of building the map has five steps in total. The goal is to create an overall view of a product's value and then visually compare it, which leads to defining individual sets of features to develop. The visualization helps reveal the minimum number of non-backbone features that can deliver any given product goal.
User Story
The foundation of the whole process is the so-called User Story. It's a format for communicating value to the user. The format reads as follows:
English original = As a (who wants to accomplish something) I want (what I want to accomplish), so that I (why I want to accomplish it).
Czech translation = Já jako (někdo, kdo chce něco dokázat) chci (co chci dokázat), abych (proč to chci dokázat).
The following example helps clarify the format: As a B2B product manager, I want to analyze customer cohorts by retention, so that I can better understand which features impact retention and which don't.
Every feature, task, and activity created during the mapping is written in this format.
Mapping User Stories
The entire process of mapping individual User Stories into a visual map is carried out by a group of people who matter to the intended product — not just developers, but people from the business side as well. The goal of the mapping is to create a visual story of how the whole product works.
Step 1.
To start, someone needs to write down or state:
who the customers of the product are,
what the product's core value is, and
what the organization's main goals are for this product.
This information is the foundation of the entire framework and usually comes from the senior members of the team. To communicate it effectively, you can use the Value Proposition Statement framework, for example.
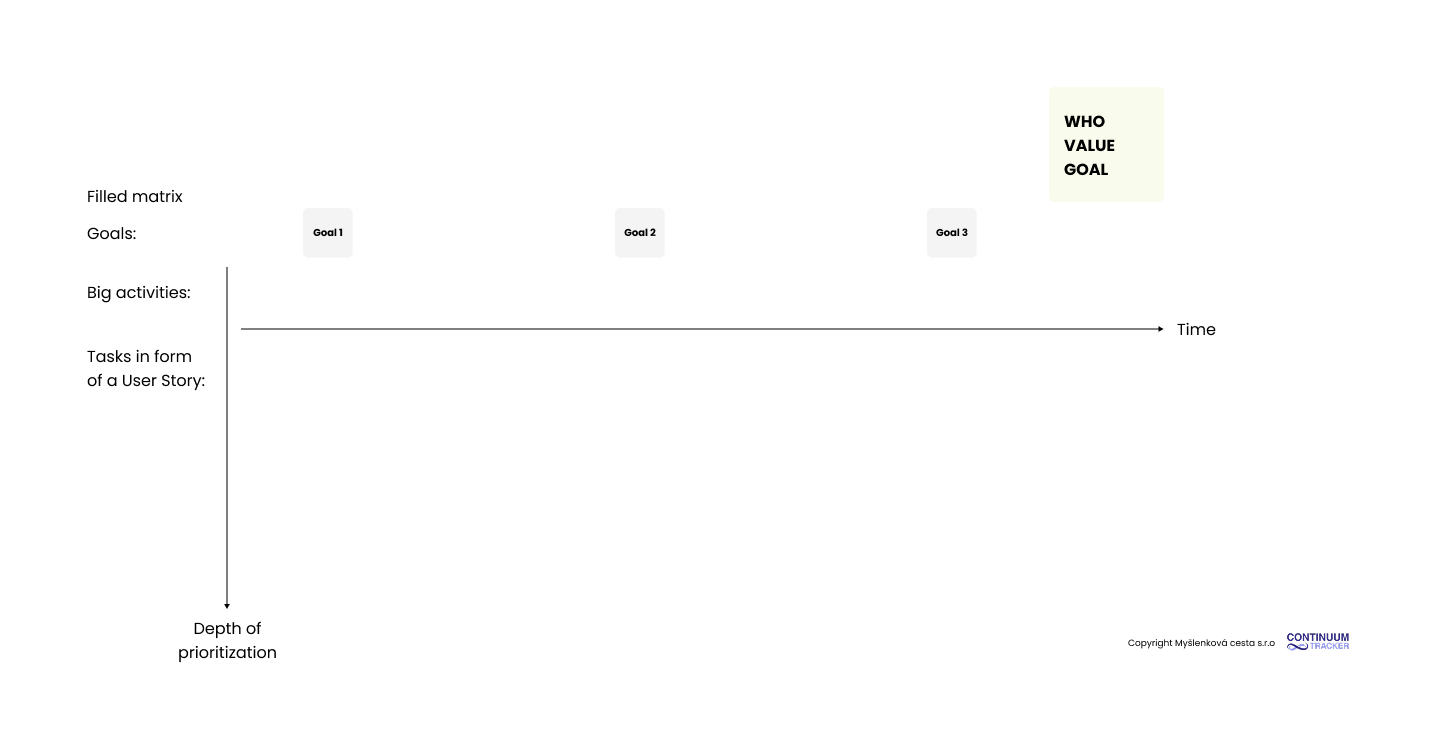
Visual example of User Story Mapping, step 1
Step 2.
Customers always have some goal they're trying to reach with the product. We try to visualize that goal through organized user stories. We're building the backbone of the whole product — its core value to the user — which also serves as the context for the product's value.
We gradually map the critical activities the user performs on the way to reaching their goal. Picturing what a typical day looks like for a customer using the intended product is usually a good starting point for this step.
We write these activities as User Stories. This gives us a visual story — a chronological progression of how the user reaches their goal with the intended product — laid out as a timeline read from left to right.
If the user has more than one goal, we can write those above the backbone activities. Usually, though, the user — and therefore the product — has one main goal with many subgoals. Activities that aren't part of the backbone but are connected to it, we start placing as User Stories in a column beneath the backbone activities.
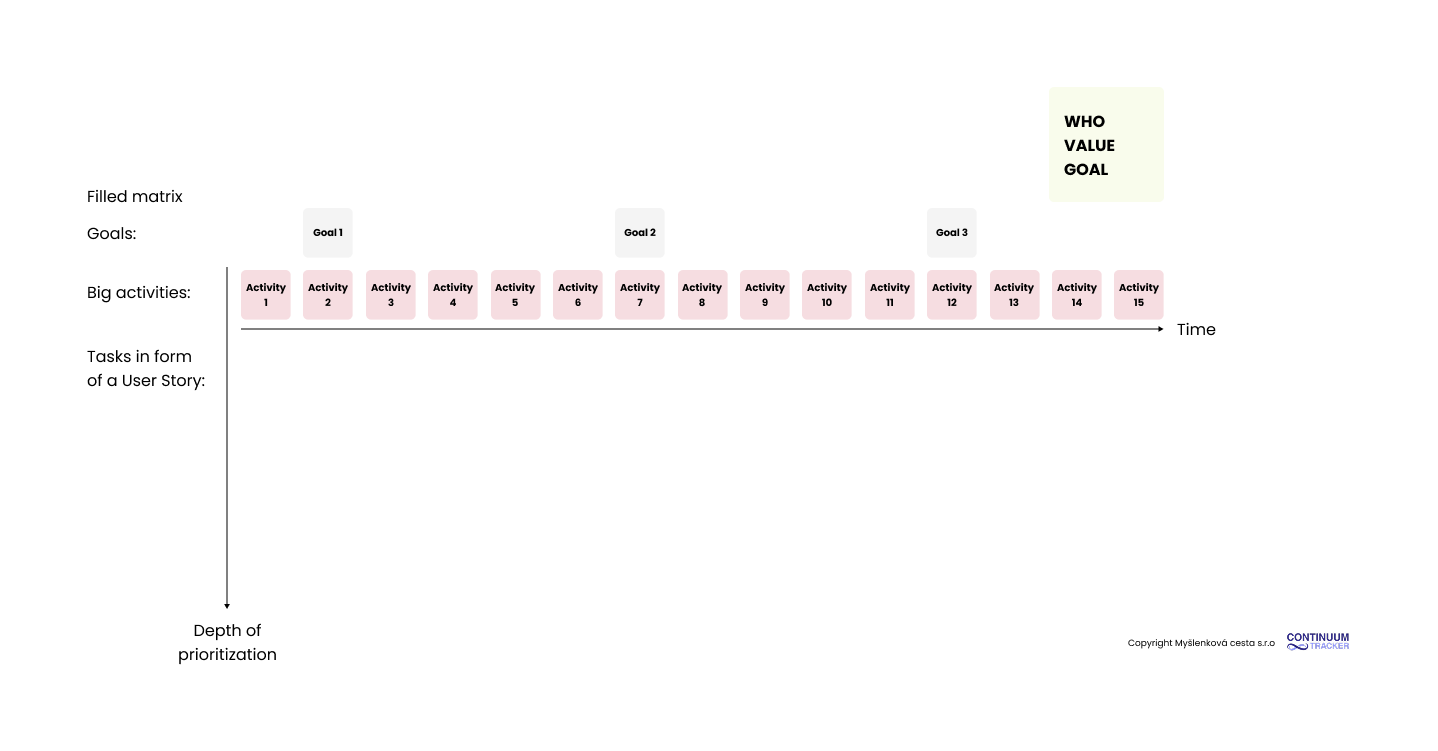
Visual example of User Story Mapping, step 2
Step 3.
It's time for a creative explosion. The secondary activities we added beneath the backbone activities in step two now get enriched with further activities. We break the secondary activities into smaller and smaller pieces, ask "what if?", and keep adding more User Stories, which we split into smaller activities.
Our compass when choosing new and often less important tasks should be their logical connection to the backbone activity above them and to the goal.
The result of the third step is a final map of all activities, categorized into groups by goal and backbone task, and additionally ordered chronologically in time. It's the story of the product's value to the customer.
Visual example of User Story Mapping, step 3
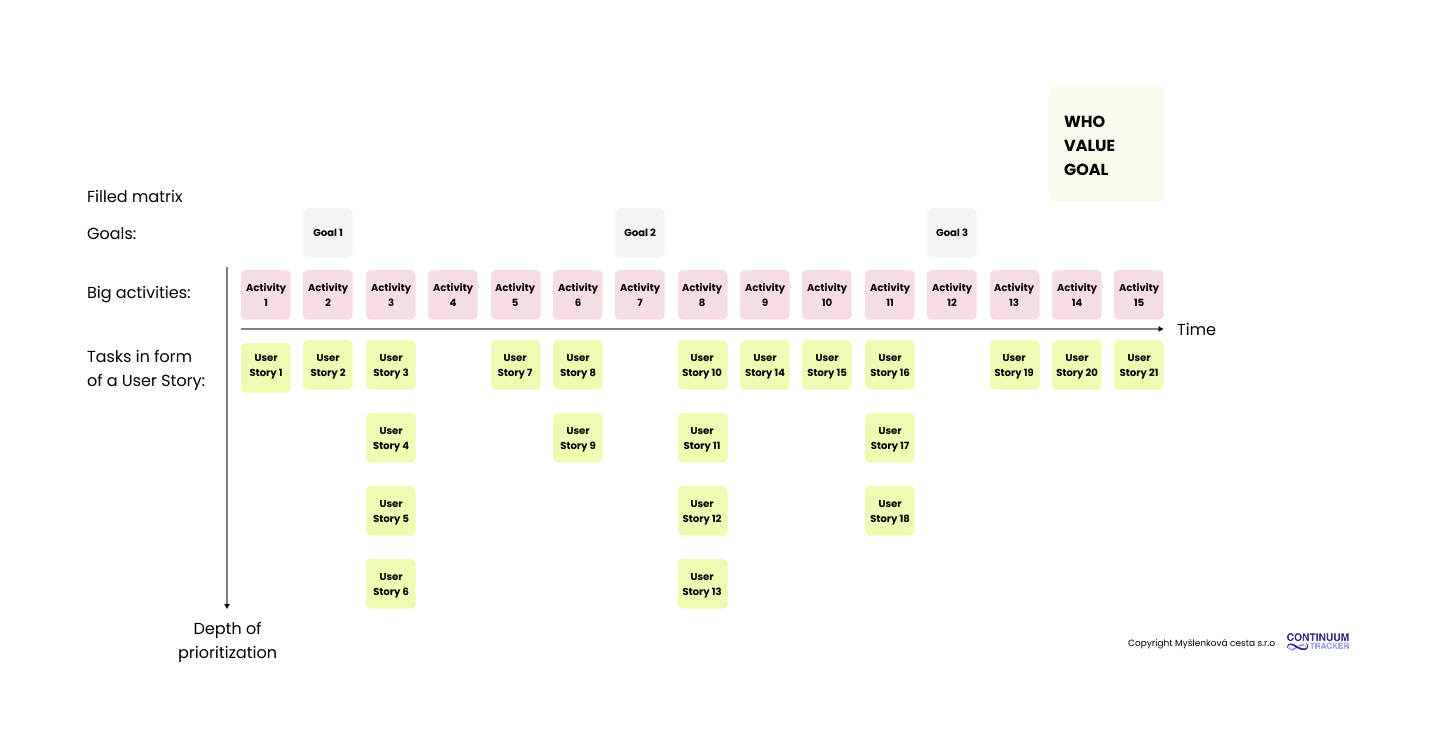
Step 4.
The fourth step is dedicated to prioritization. The backbone activities aren't prioritized, because without them the product won't work as a whole — so building them is a prerequisite for bringing the product to market.
We arrange the secondary activities within each column so that horizontally they always form one version of the product, and vertically they form the development priority. We separate the individual product versions with a thick horizontal line between the secondary activities.
Each product version is a set of the minimum number of features that, taken together, deliver a particular goal. The goal can be set by the business, but it should always sit within the context of the whole solution — that is, the backbone activities and the user's goals.
The key step is defining success for each product version through a set of criteria that show whether that version actually fulfilled its goal.
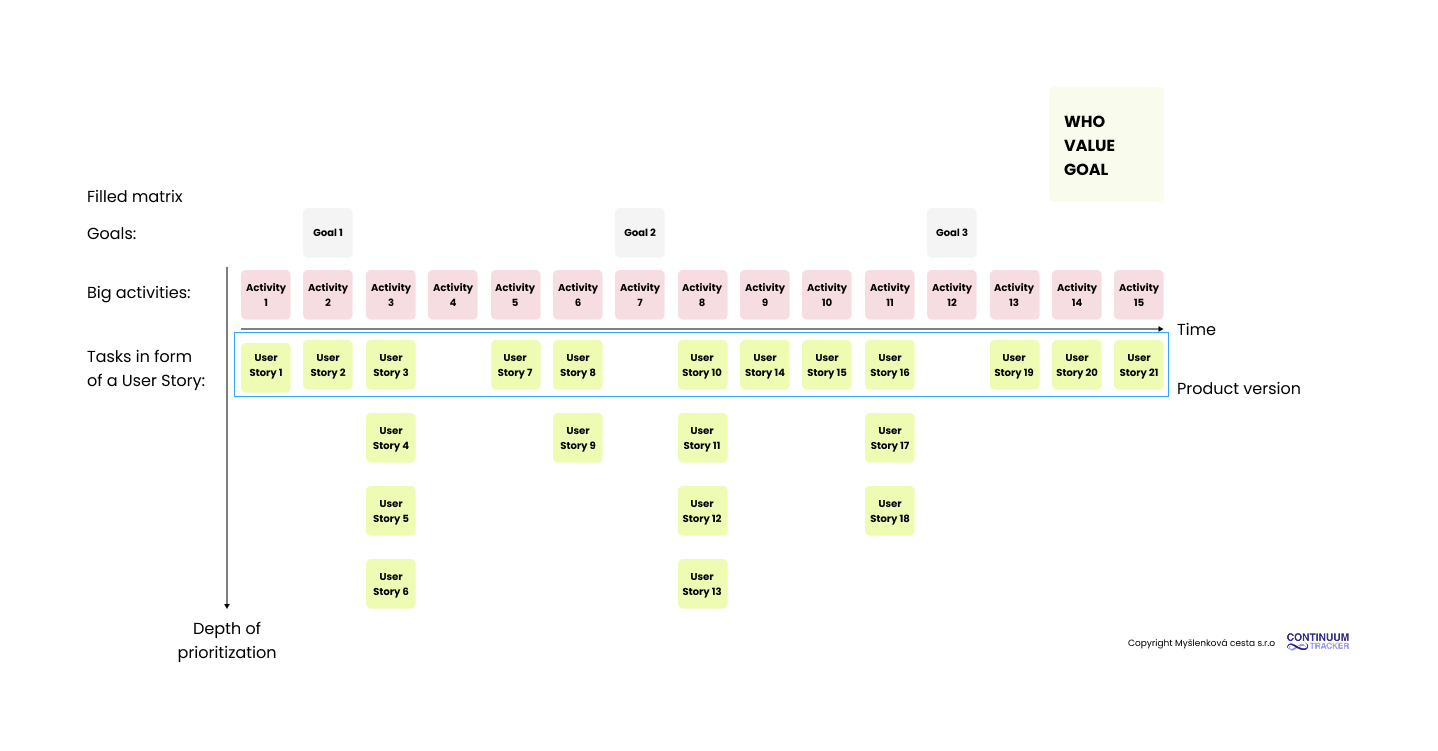
Visual example of User Story Mapping, step 4
Step 5.
The fifth step is optional, meant for the execution strategy of the chosen product version. This version can now be split into three or more releases. This split reduces the risk of failing to deliver value to the customer, as well as the risk of missing the communicated delivery deadline. After each release, we can pause and assess the situation.
According to the framework, the ideal rule for splitting product versions is to follow chess strategy. Each product release can be divided into:
Opening Game = the goal is to build a so-called functional walking skeleton — the simplest possible set of features that delivers value to the customer and makes it possible to validate that value.
Mid Game = the goal of the Mid Game is to add all the important features that expand the product and create a sense of completeness.
End Game = the features in the end game then target bug fixing, product performance, and scenarios that weren't captured during previous releases.
Step five can be repeated for each new product version.
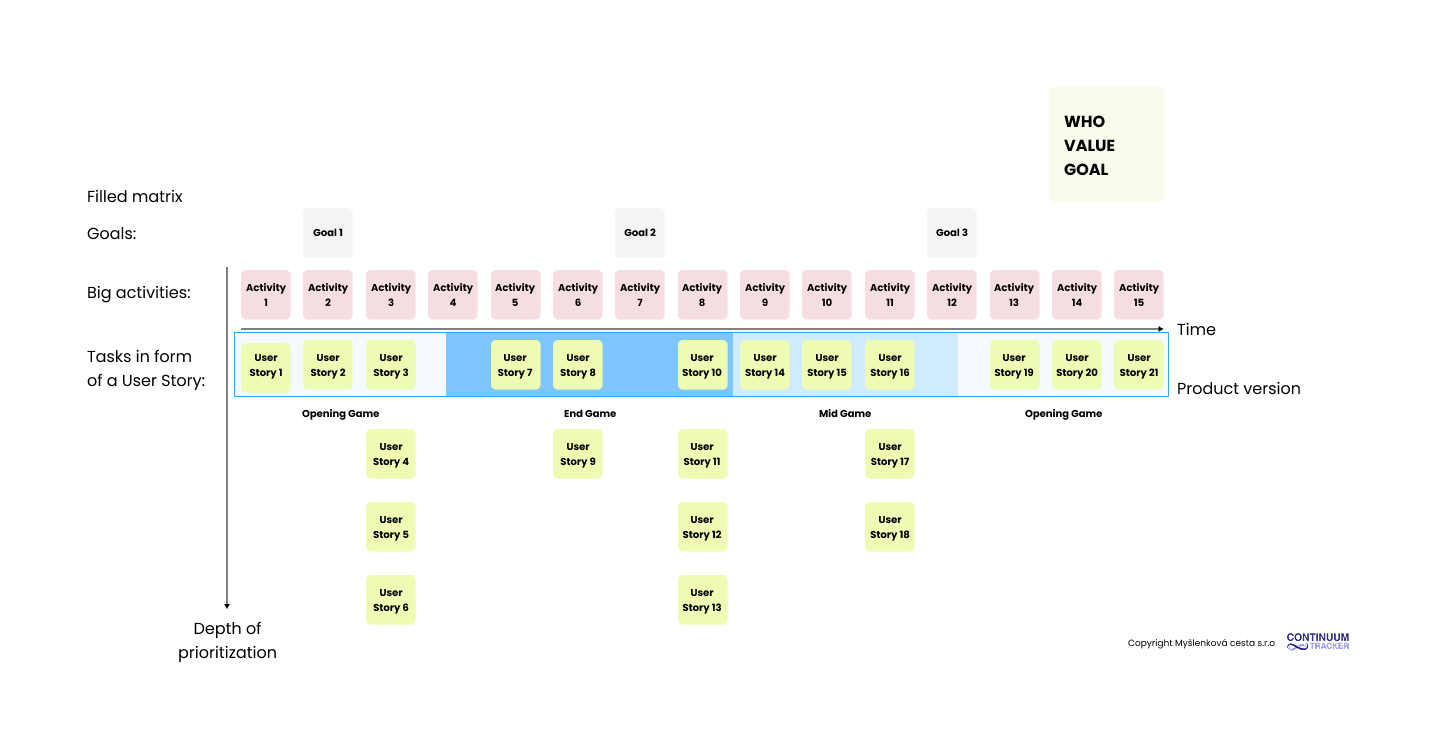
Visual example of User Story Mapping, step 5
Mapping for an Existing Product
Product managers don't always start with a completely new product. Very often they're adding new features to an existing one. That product already has backbone features that users rely on. At this point, it's worth considering whether to build the entire User Story Map, or simply sketch out the backbone features and prioritize the new User Stories against them. The second option takes less time.
A Prioritization Example
Our product is a mobile app for managing — or rather, blocking — the time spent on a phone.
Step 1.
Who the customers are = phone users who are also addicted to their phones.
The product's core value = the ability to block phone use for a set period, which helps reduce addiction.
The product's goal = reach 1,500 paying customers.
Step 2.
The user's goal: reduce the amount of time spent on the phone by blocking it.
Activity 1: As a user who spends too much time on my phone, I want to set time-based blocking for apps or the whole phone, so that I can focus better on work, study, or rest without distractions.
Activity 2: As a user who spends too much time on my phone, I want to be able to block only selected apps for a set period, so that I can limit my habits while still using the phone for essential things.
Activity 3: As a user who spends too much time on my phone, I want to see an overview of my screen time and blocking statistics, so that I stay motivated to continue and can see my progress.
Activity 4: As a user who spends too much time on my phone, I want to be able to set "unbreakable" blocking (e.g. with no password or snooze option), so that the app genuinely helps me reduce my addiction.
Step 3.
Activity 1: As a user who spends too much time on my phone, I want to set time-based blocking for apps or the whole phone, so that I can focus better on work, study, or rest without distractions.
Task as a User Story 1: As a user, I want to choose the specific apps or the whole phone that will be blocked, so that I have control over what won't be available to me during a block.
Task as a User Story 2: As a user, I want to set the length of the block (e.g. 15 minutes, 1 hour, a custom interval), so that I can tailor the blocking to my activity.
Task as a User Story 3: As a user, I want to schedule blocking for a specific time or on a recurring basis (e.g. every day from 10:00 PM), so that I don't have to set it up manually every time.
Task as a User Story 4: As a user, I want to see clear information about how much time is left until the block ends, so that I know when the phone will be available again and can better hold out without distractions.
Task as a User Story 5: As a user, I want to be able to choose the strictness level of the block (e.g. an emergency-unlock option vs. no bypass at all), so that the block matches my current discipline and goal.
Task as a User Story 6: As a user, I want to see a motivational message or reminder during a block explaining why I turned blocking on, so that I'm less tempted to turn it off.
Step 4.
In addition to the backbone activities, the first version of the product will include the following User Stories.
Task as a User Story 2: As a user, I want to set the length of the block (e.g. 15 minutes, 1 hour, a custom interval), so that I can tailor the blocking to my activity.
Task as a User Story 3: As a user, I want to schedule blocking for a specific time or on a recurring basis (e.g. every day from 10:00 PM), so that I don't have to set it up manually every time.
Step 5.
We split the final version of the product into the following releases:
Opening Game = all the backbone activities,
Mid Game = the Mid Game release will deliver User Story B and User Story C,
End Game = the final release will contain the User Stories from Activity C, dedicated to statistics.
Visual example of prioritization